Tips

外部テキストファイルを読み込む

外部で用意したテキストファイルを読み込むスクリプトを実装

1.読み込むファイルをResourcesフォルダ以下に格納
Resourcesフォルダ以下にあるアセット(ファイル)はResourcesクラスからアクセスすることができる

2.読み込むオブジェクトに以下のスクリプトをアタッチ

using UnityEngine;
using System.Collections;
public class readText : MonoBehaviour {
void Start () {
//resourcesフォルダ内にあるsampleTextファイルをロード
TextAsset textAsset = Resources.Load("sampleText") as TextAsset;
//ロードした中身をstring型に変換
string text = textAsset.text;
//1行ずつに分割
string[] row = text.Split('\n');
for (int i = 0; i < row.Length; i++) {
Debug.Log(row[i]);
}
}
}

これを活用すればアイテムマスタ等のデータ管理に使えるようになる…?

ゲーム起動時にロゴマークを表示した後、タイトル画面へ遷移させる処理

ゲーム起動時によくある、ロゴマークを表示して音声を再生した後、フェードアウトしてタイトル画面へ遷移する処理を実装

1.画面を作成する
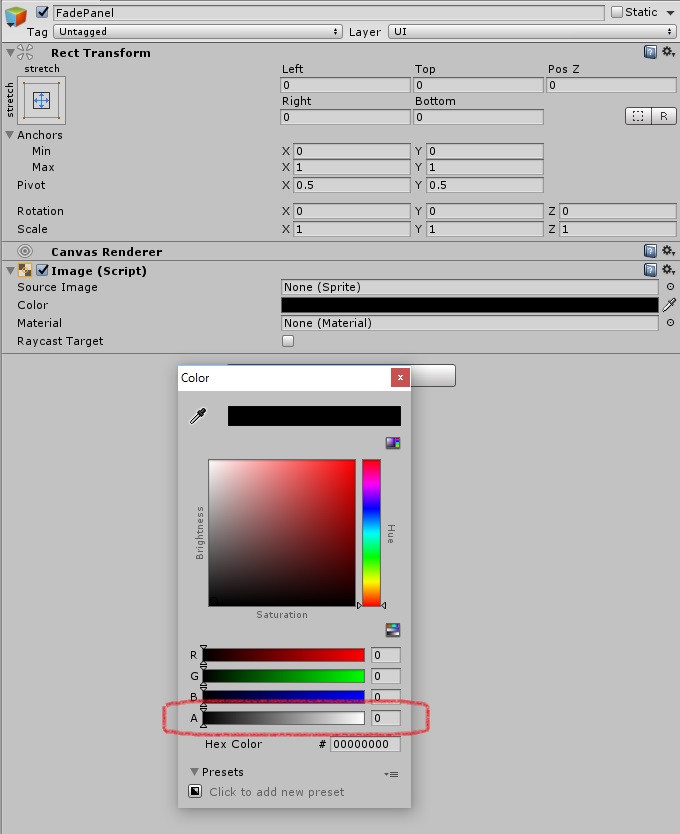
 uGUIで下から背景用のpanel(Background)、ロゴ画像用RawImage(Logo)、フェードアウト用のPanel(FadePanel)を重ねて配置する
00014

 この時、フェードアウト用のPanel(FadePanel)のアルファ値を0にして透明状態にしておく
00015

2.空のオブジェクト(LogoControl)を作成し、以下のスクリプトをアタッチする

using UnityEngine;
using UnityEngine.UI;
using UnityEngine.SceneManagement;
using System.Collections;
public class TransitionScene : MonoBehaviour {
public float soundTime = 2.0f; //音声再生の開始タイミング(秒)
public float fadeOutTime = 5.0f; //フェードアウトの開始タイミング(秒)
private float nowTime = 0.0f; //タイミングカウント用
public GameObject panel; //フェードアウト用パネルUIオブジェクト
private Image image; //panelのコンポーネント
private Color color; //panelのカラー設定
private AudioSource audioSource; //音声再生用のオーディオソース
private bool soundFlg = false; //音声再生用フラグ
void Start () {
//音声再生用のオーディオソース取得
audioSource = GetComponent<AudioSource>();
//フェードアウト用のパラメータ取得
image = panel.GetComponent<Image>();
color = image.color;
}
void Update() {
//deltaTimeを加算して経過時間を計算する
nowTime += Time.deltaTime;
//指定の秒数が経過した際、1度だけ音声を再生する
if (soundTime < nowTime && soundFlg == false) {
audioSource.Play();
soundFlg = true;
}
//指定の秒数が経過した際、フェードアウトしてシーンを遷移する
if (fadeOutTime < nowTime) {
//フェードアウトが終わったらシーン遷移させる
if (color.a == 1.0f) {
SceneManager.LoadScene("title");
}
//アルファ値が1を超過する場合は丸め込む
else if (color.a + Time.deltaTime > 1.0f) {
color.a = 1.0f;
}
//アルファ値を加算する
else {
color.a += Time.deltaTime;
}
image.color = color;
}
}
}

 このスクリプトのPanelにはフェードアウト用のPanel(FadePanel)を指定する

3.LogoControlにAudioSourceコンポーネントを追加し、再生する音声を指定する
00016

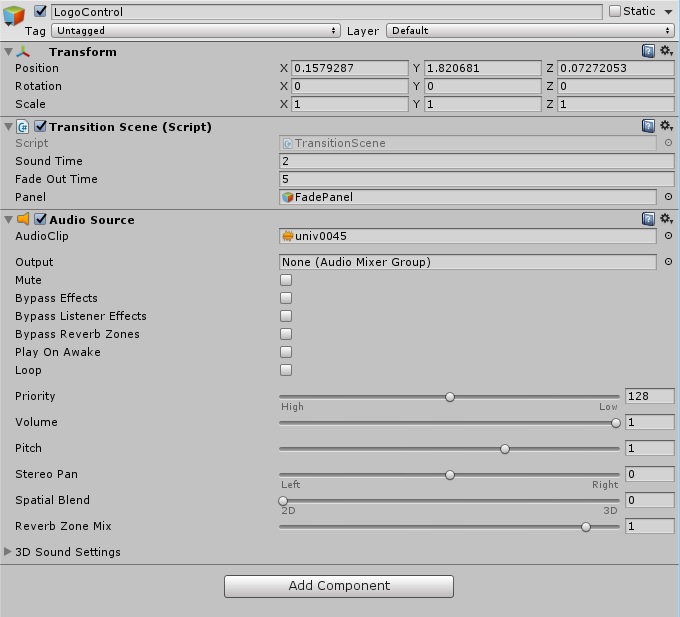
実行すると、2秒後に音声が再生、5秒後にフェードアウトが始まってタイトル画面用の別シーンへ遷移するという、ゲーム起動時によくあるような画面遷移ができる
00017

CharacterControllerを使った移動(Animator追加)

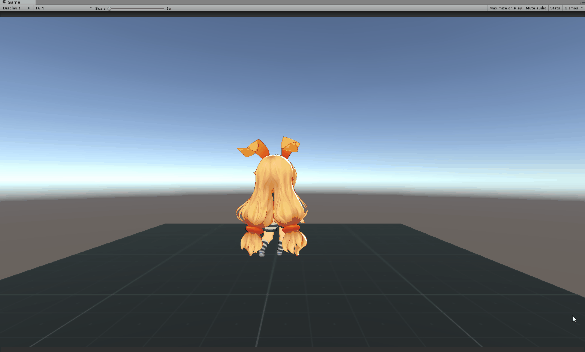
CharacterControllerを使った移動にモーションを付けてみた

Animatorに立ち、歩き、走り状態のアニメーションを設定して、キャラクターのオブジェクトにアタッチしておく
そしてCharacerBaseにアタッチしたスクリプトを以下に変更

using UnityEngine;
using System.Collections;
public class MoveCharacter : MonoBehaviour {
public float speed = 3.0F; //移動速度
public float jumpSpeed = 8.0F; //ジャンプ速度
public float gravity = 20.0F; //重力
public GameObject charaobj; //キャラクターオブジェクト
public GameObject camobj; //カメラオブジェクト
private Animator animator;
private Vector3 moveDirection = Vector3.zero; //移動方向
void Start() {
//キャラクターにアタッチされているAnimatorを取得する
animator = charaobj.GetComponent<Animator>();
}
void Update() {
CharacterController controller = GetComponent<CharacterController>();
//CharacterControllerのisGroundedで接地判定
if (controller.isGrounded) {
//入力値にカメラのオイラー角を掛ける事で、カメラの角度に応じた移動方向に補正する
moveDirection = Quaternion.Euler(0, camobj.transform.localEulerAngles.y, 0) * new Vector3(Input.GetAxis("Horizontal"), 0, Input.GetAxis("Vertical"));
//移動方向をローカルからワールド空間に変換する
moveDirection = transform.TransformDirection(moveDirection);
//移動速度を掛ける
moveDirection *= speed;
if (Input.GetButton("Jump")) {
//ジャンプボタンが押下された場合、y軸方向への移動を追加する
moveDirection.y = jumpSpeed;
}
}
//水平移動分のベクトルを取得する(アニメーションの制御用)
var moveVector = new Vector3(moveDirection.x, 0, moveDirection.z);
//ベクトルから速度を取得し(magnitude)、アニメーターに渡す
animator.SetFloat("speed", moveVector.magnitude / speed);
//移動時にのみキャラを回転させる(待機時に方向が固定されず前方を向いてしまうため)
if (moveVector.magnitude > 0) {
//移動方向に向けてキャラを回転させる
charaobj.transform.rotation = Quaternion.LookRotation(moveVector);
}
//y軸方向への移動に重力を加える
moveDirection.y -= gravity * Time.deltaTime;
//CharacterControllerを移動させる
controller.Move(moveDirection * Time.deltaTime);
}
}

00013

これでアクションゲームのプレイヤーのような挙動ができるようになったはず

CharacterControllerを使った移動

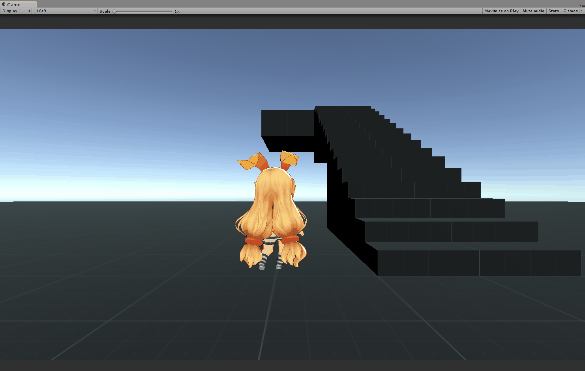
キーボードやコントローラーで入力した方向にオブジェクトを移動させる
で実装したオブジェクトの移動をCharacterControllerを使って移動できるようにする

まず空オブジェクト(CharacerBase)を作成して、その子オブジェクトに表示するキャラクターのオブジェクトと、ここで作成したカメラオブジェクトを配置する(positionも統一させる)
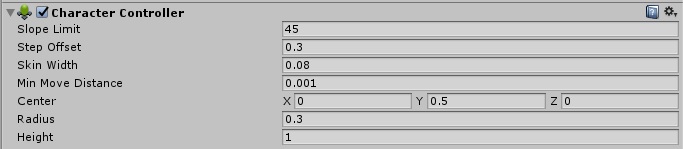
CharacerBaseにCharacterControllerを追加して、コライダーをキャラクターのサイズに調整する
00011

CharacerBaseに以下のスクリプトをアタッチする

using UnityEngine;
using System.Collections;
public class MoveCharacter : MonoBehaviour {
public float speed = 6.0F; //移動速度
public float jumpSpeed = 8.0F; //ジャンプ速度
public float gravity = 20.0F; //重力
public GameObject charaobj; //キャラクターオブジェクト
public GameObject camobj; //カメラオブジェクト
private Vector3 moveDirection = Vector3.zero; //移動方向
void Update() {
CharacterController controller = GetComponent<CharacterController>();
//CharacterControllerのisGroundedで接地判定
if (controller.isGrounded) {
//入力値にカメラのオイラー角を掛ける事で、カメラの角度に応じた移動方向に補正する
moveDirection = Quaternion.Euler(0, camobj.transform.localEulerAngles.y, 0) * new Vector3(Input.GetAxis("Horizontal"), 0, Input.GetAxis("Vertical"));
//移動方向をローカルからワールド空間に変換する
moveDirection = transform.TransformDirection(moveDirection);
//移動速度を掛ける
moveDirection *= speed;
if (Input.GetButton("Jump"))
//ジャンプボタンが押下された場合、y軸方向への移動を追加する
moveDirection.y = jumpSpeed;
}
//移動方向に向けてキャラを回転させる
charaobj.transform.rotation = Quaternion.LookRotation(new Vector3(moveDirection.x, 0, moveDirection.z));
//y軸方向への移動に重力を加える
moveDirection.y -= gravity * Time.deltaTime;
//CharacterControllerを移動させる
controller.Move(moveDirection * Time.deltaTime);
}
}

00012

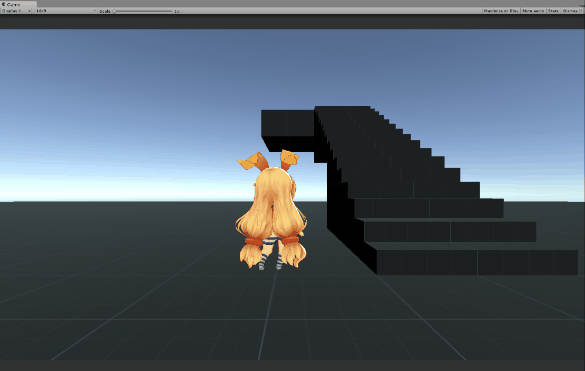
移動はできるようになったものの、移動時のアニメーションがついていないのでちょっと違和感
スクリプトにアニメーション関連を実装すればそれっぽくなるはず

オブジェクトを中心にしたカメラの回転処理

対象のオブジェクトを中心にしてカメラを回転させる処理を実装する

まず対象のオブジェクトの子オブジェクトに空オブジェクトを作成し、位置を対象と同じにする。
更にその子オブジェクトにメインカメラを配置する。
空オブジェクトに以下のスクリプトをアタッチする

using UnityEngine;
using System.Collections;
public class RotateCamera : MonoBehaviour {
public int maxAngle = 60; //垂直方向に回転できる上限角度
public int minAngle = 359; //垂直方向に回転できる下限角度
public float speed = 360.0f; //回転速度(角度/秒)
void Start() {
}
void Update() {
//入力から回転を取得(Horizontal2、Vertical2はコントローラーのスティックを割り当て)
float horizontal = Input.GetAxis("Horizontal2") * speed * Time.deltaTime;
float vertical = Input.GetAxis("Vertical2") * speed * Time.deltaTime;
//入力があった場合、その方向へ回転させる
if (Input.GetAxis("Horizontal2") != 0 || Input.GetAxis("Vertical2") != 0) {
//水平方向に回転させる(水平方向はワールド軸)
this.transform.Rotate(0, horizontal, 0, Space.World);
//垂直方向は90度以上回転しないよう制限する
if (this.transform.localEulerAngles.x + vertical <= maxAngle ||
this.transform.localEulerAngles.x + vertical >= minAngle) {
//垂直方向に回転させる(垂直方向はローカル軸)
this.transform.Rotate(vertical, 0, 0, Space.Self);
}
}
}
}

カメラではなく、カメラの親オブジェクトを回転させる事で、対象のオブジェクトの周りを回転できるようにしている
水平軸の回転はワールド軸にして、y軸を中心に回転させることがポイント

00010